About a year and a half ago, I wrote a post about how cameras see the world differently than we do. One of the main points of that post was that it’s not realistic to expect our cameras to capture the world in the way our brain and eyes do. There are differences in the physical capabilities of the lenses (our eyes versus our cameras), of course, but the biggest difference is that our brain interprets and corrects what passes through our lenses. As a result, if we want to produce camera images that represent what we see – or remember seeing – in the world, we have to understand and adjust to the differences between humans and cameras.

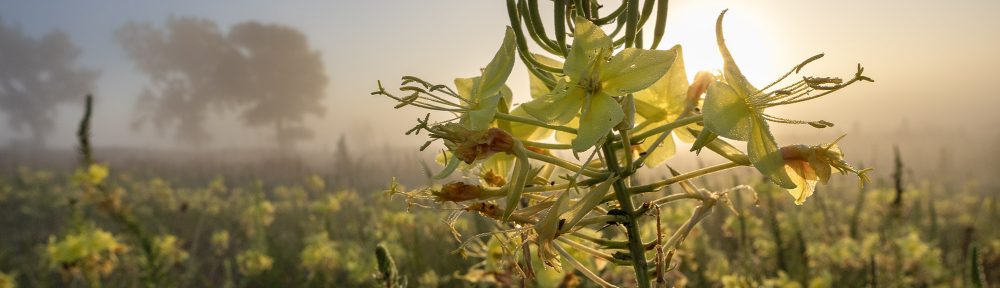
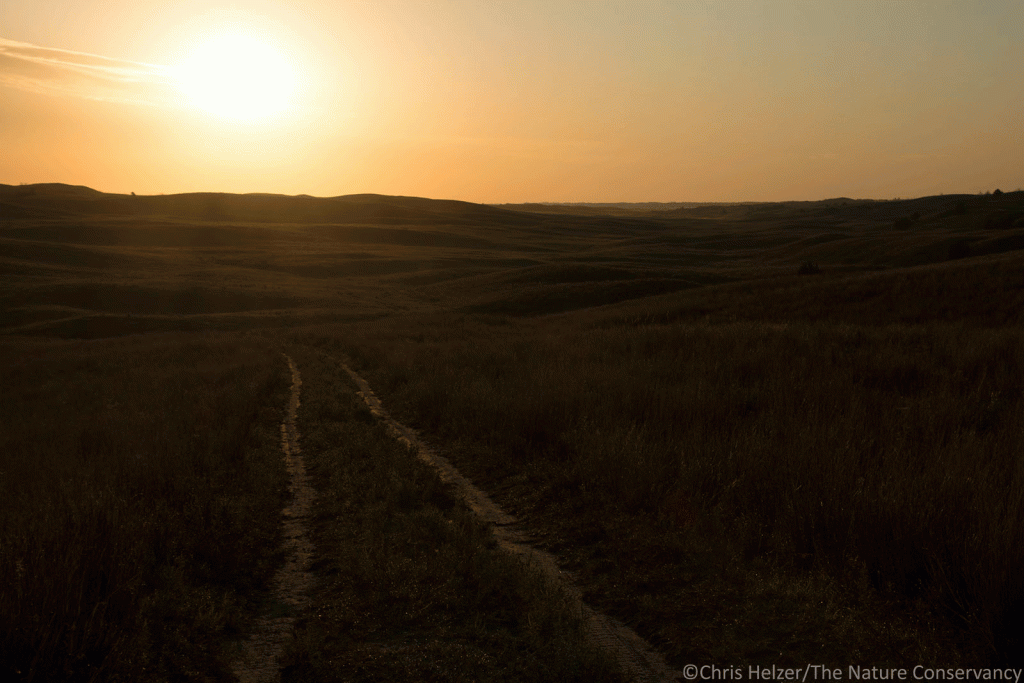
One situation in which those differences become very obvious is when taking photos that include the sun itself within the image. Over the last few years, I’ve found myself including the sun in more and more photos – especially early in the morning and late in the evening. I like the mood and context those photos create, and it’s something a little different than the portraits of flowers and insects I shoot most often. I’ve experimented with ways to make those images look the way I want, and decided to share a few tricks with you today. These are just a few strategies I personally use – I’m sure there are many different tricks used by other photographers. I welcome you to share your own in the comments below.
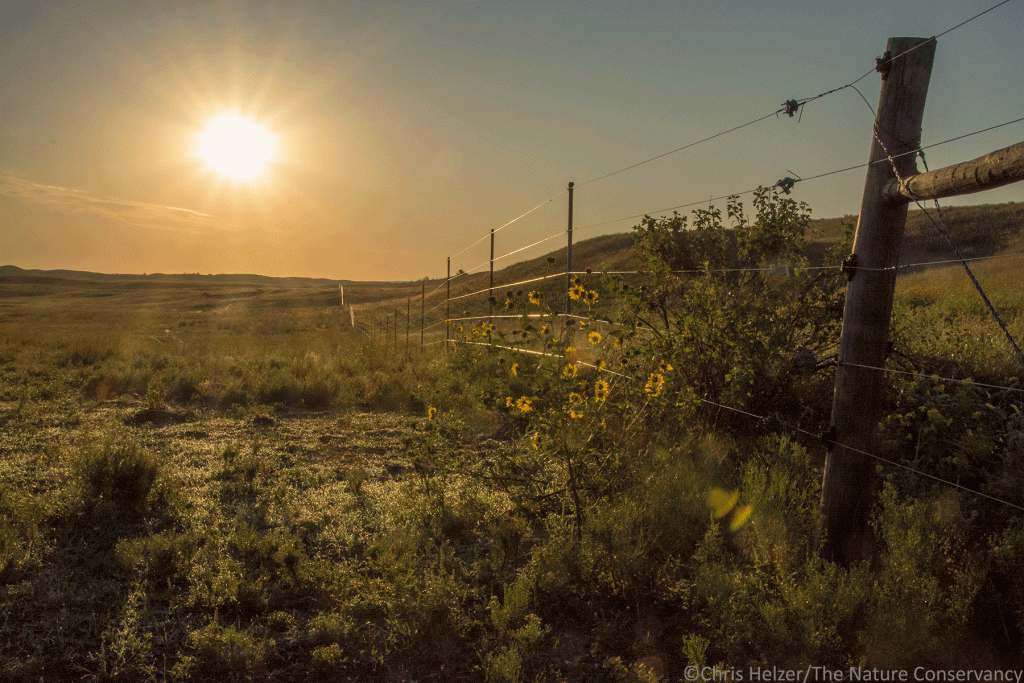
The first challenge that comes from shooting into the sun is lens flare, which can create circles, hexagons, or arcs of light and color on the image. These are a result of light being reflected and scattered by the lens itself. The size of the aperture (the opening through which light passes into the camera) can influence what those look like, as can the glass quality and various coatings of the lens itself. Dust or other spots on the lens can increase light scatter.
There are a few ways to deal with lens flare. First, a clean lens will help minimize the effect. Second, taking numerous shots while shifting the camera location and angle slightly each time can give you a lot of options to choose from later. Flare spots in some parts of an image may be less obvious or troublesome than others, and it can be hard to see that while in the field.
In rare cases, I’ve used the clone stamp or other editing tools in Adobe Photoshop to reduce or eliminate particularly irritating flare spots. In other cases, I’ve just left them alone – either because editing is not feasible or because the spots don’t bother me. Deciding when or how to make these kinds of edits is something every photographer deals with differently. In my case, I feel like minor lens flare that detracts from an otherwise good image is fair game for editing (sometimes), especially because it’s not part of what my eyes/brain were seeing at the time.
(If you’re really uncomfortable with the idea of photographers editing their images, you’re perfectly within your rights. However, I do encourage you to read my earlier post about how cameras see differently than we do. I’d also remind you that post-processing of images has been going on since the days of black-and-white photography and darkrooms, when photographers spent large amounts of time trying to dodge and burn images to create prints that better resembled what they’d seen in person. Personally, I would never add something new to a photo, but I feel just fine about making some lighting corrections and adjusting for/correcting things like lens flare that are related to the physical limitations of camera equipment.)
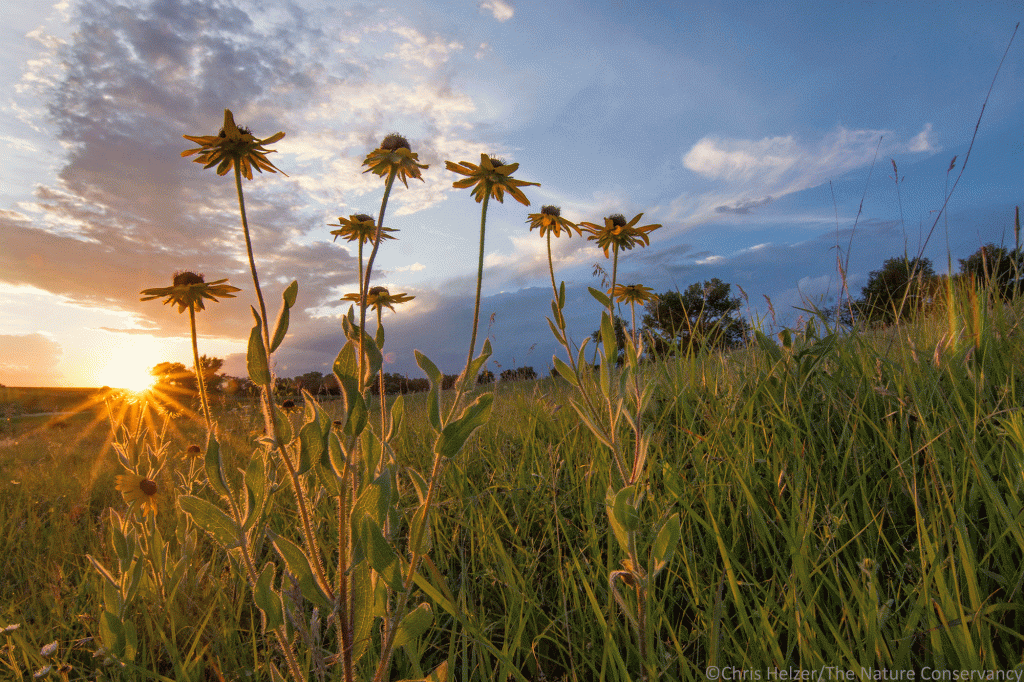
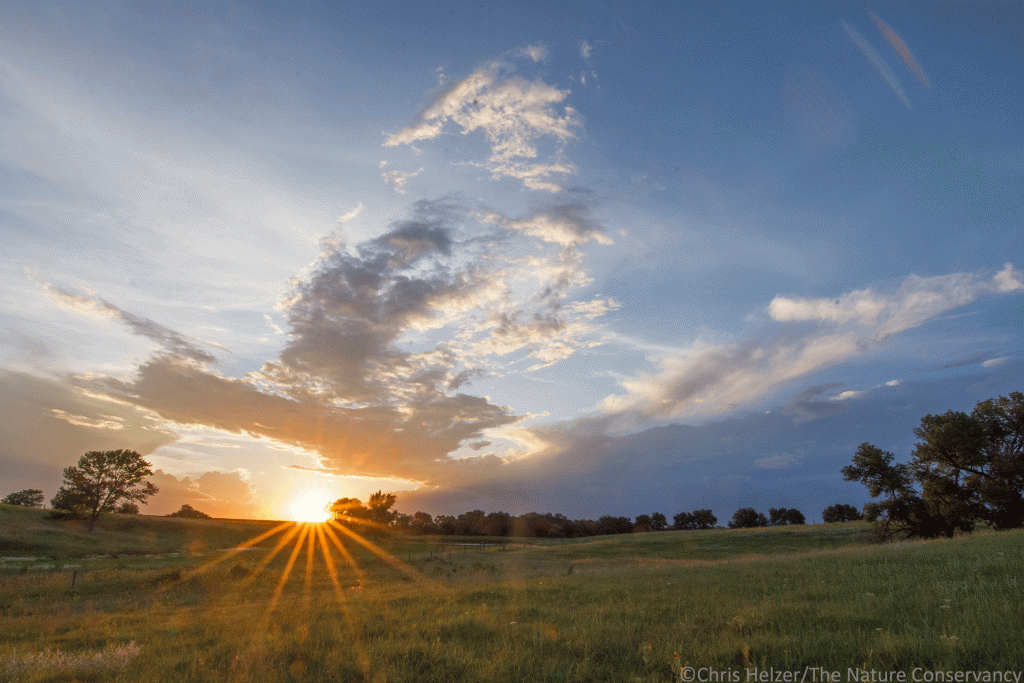
Of course, the scattering of light through a lens can also create effects that are attractive. The ‘starburst’ patterns around the sun is a great example of that. I often shoot with a very small aperture (high f/stop number like f/22) in order to create that effect. If you look at a light source near you and squint your eyes, you’ll see a similar effect. I’m just making my camera squint at the sun.
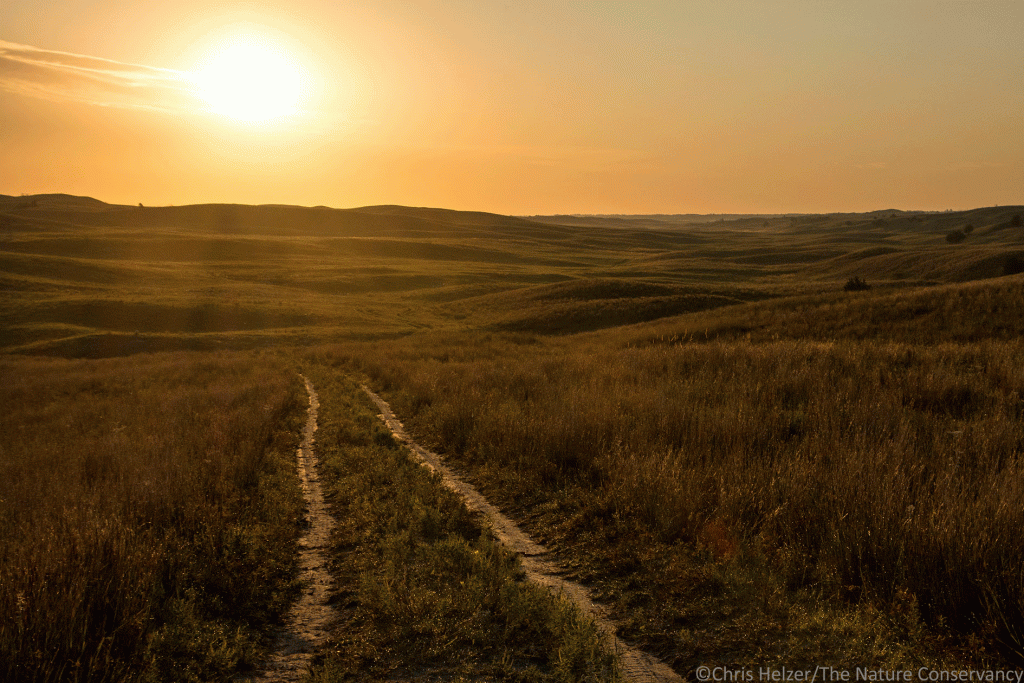
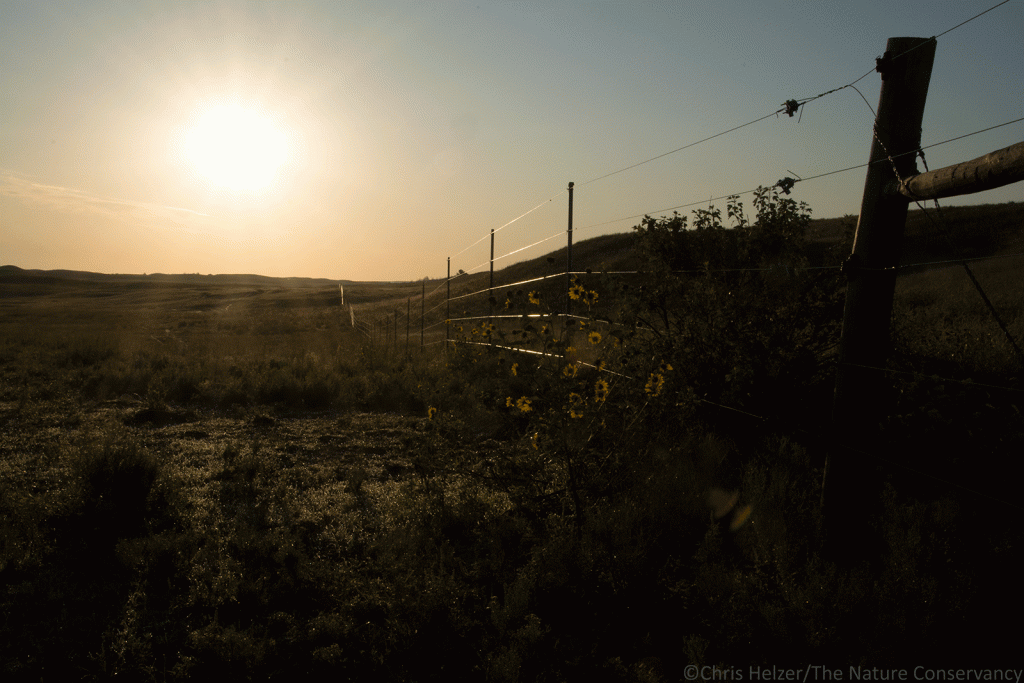
The sometimes overwhelming intensity of sunlight creates the biggest challenge related to shooting into the sun. Because the sun is so much brighter than the landscape, cameras have a hard time knowing how to correctly expose images that include both. If the photographer or camera sets lighting conditions based on the land, flowers, or other subjects in the foreground, they will be the right brightness, but the bright sun and surrounding sky will be completely washed out and without detail. Alternatively, in order to keep any color or details in the sky, the camera needs to be set in a way that makes the foreground very dark.
Before digital editing was available, photographers used tools like graduated neutral-density filters to deal with the difference in light intensity (and some still do). Today, editing software can help recover some details in parts of a photo that are overly dark. However, as far as I know, it’s not possible to recover details that lost because of excessive brightness. Because of that, when photographing scenes that include the sun, I ‘shoot dark’ and adjust later. In other words, I set the camera to expose for the brighter parts of the photo, keeping them from washing out, but allowing other areas to appear darker than they appear to my eyes. That allows me to edit the image later and recreate a scene the resembles what my brain and eyes saw in the moment.


I hope this is useful information for anyone looking to expand their photography repertoire. Including the sun in photos definitely increases the degree of difficulty – and time – needed to create pleasing images. On the other hand, some of my favorite prairie photos are those for which I put in that extra time and effort to recreate a spectacular scene I experienced and wanted to share with others.
One important final thought… The sun is really bright. Dangerously so, in fact. Staring at the sun is bad for your eyes, and doing so through a camera that magnifies it is even more dangerous. Be really careful. In addition, there is a risk of damaging your camera’s sensor, especially if you use long exposures (slow shutterspeeds). I mitigate some of those risks to my eyes and camera by photographing the sun while it’s still close to the horizon (and less intense than during the middle of the day) and by limiting the amount of time I spend looking through the viewfinder.

Thanks for letting us in on how to improve photos.
Chris, I can’t say how much I’ve enjoyed your blog this year and before. Thanks so much for sharing your expertise and appreciation for natural beauty with us. Wishing you and your family the very finest of holidays and new year, Linda
A very useful post that I’ve saved to re-read more slowly. The before-and-after examples are great, as are the explanations. Thanks for taking the time to put the post together.
Chris, while you’re out shooting close to sunset, have you considered trying to capture the green flash? I’ve seen lots of images over water and would love to see one with the prairie in the (distant) foreground. I’ve never seen it visually in Nebraska – or anywhere else – despite a number of attempts.
I haven’t, and haven’t really looked into the possibilities, to be honest. I’ll have to do that!